Our easy-to-use ‘peel-and-stick’ wallpaper is brightening up homes all around the country, and anyone can use it to transform their space!
Supplies Needed
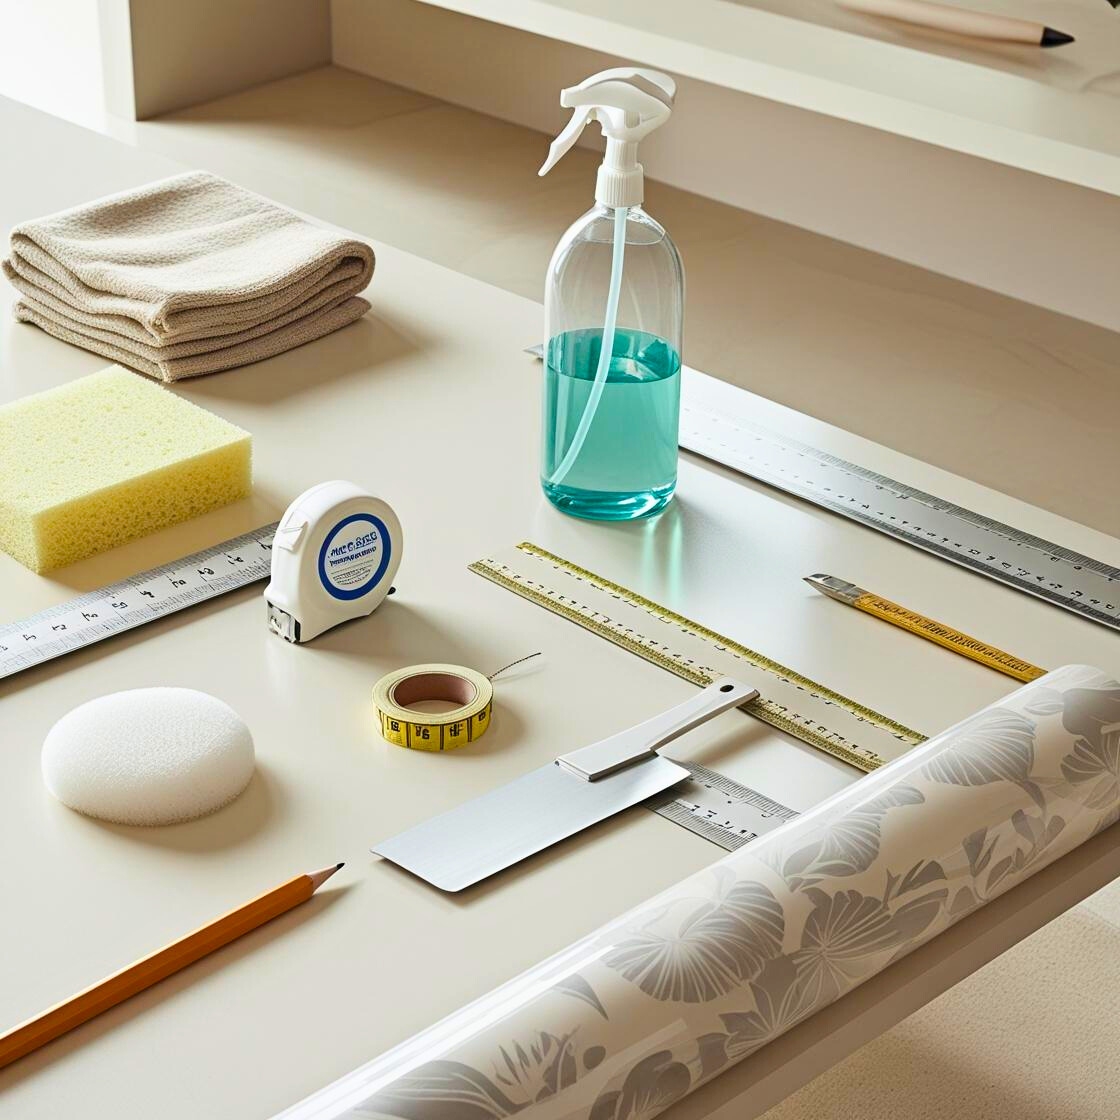
- Sponge or cloth
- Mild cleaner
- Measuring tape
- Straightedge
- Pencil
- Peel-and-stick wallpaper
- Plastic smoothing tool
- Utility knife
Step-by-Step Directions
Follow these instructions to apply the peel-and-stick wallpaper and quickly add colour or your own unique design or pattern to your space.
Step 1: Order Your Wallpaper
This is the easiest step, simply visit our website to order your wallpaper by clicking here.
Step 2: Prep Walls
Turn off the power to safely remove outlet covers and light switch plates in the area you plan to cover. Next, lightly clean the surface of the wall by wiping it down with a damp sponge or cloth and a mild, non-abrasive cleaner. Wait at least 24 hours to allow the surface to dry completely.
Step 3: Make a Guide for Your First Piece
Measure the width of your peel-and-stick wallpaper, then transfer that measurement to your wall with a pencil. Use a straightedge and level to draw a line from the ceiling to the floor or your skirting board (or the area you’re covering) in line with your marks. This guide will help you apply the first strip of wallpaper in a straight line.
Step 4: Apply Peel-and-Stick Wallpaper
Peel off about 30cm of the adhesive backing and line the wallpaper up with your lines, starting from the highest point you’ll be applying wallpaper to. Moving from top to bottom, press and smooth the wallpaper against the wall while peeling off the remaining backing. Using downward strokes, run a plastic smoothing tool along the wall to remove air bubbles. Once the entire piece has adhered to the wall, use your straightedge and a small utility knife to carefully cut along the baseboard and remove any excess.
Step 5: Match Patterns and Repeat
When applying subsequent pieces, line up the wallpaper pattern to ensure a seamless look. Overlap the second piece slightly with the first and run the smoothing tool along the seam to make it lay as flat as possible. Trim at the bottom as needed and repeat to cover the entire surface.
Step 6: Work Around Windows and Outlets
When you reach a window, door frame, or outlet, let the wallpaper overlap it. Once the piece is applied, use a straightedge and utility knife to trim and remove the excess. Next, smooth the paper against the wall around all sides of the outlet or window. Ensure the power is still turned off for electrical outlets and switch plates, and use a utility knife to carefully cut away the paper over the opening. Don’t worry about rough edges around the hole; the outlet cover or switch plate will hide most imperfections. You can also apply paper to flat plates for a seamless look.
Step 7: Check for Air Bubbles
If any air bubbles remain, use the tip of your utility knife or a pin to create a small hole in the middle of the bubble. Then, press down to release the air trapped inside and smooth the wallpaper.
And that is it friends – quick, fun, easy, and affordable! So what are you waiting for?
🖼️ At Canvas Print Co. we bring your memories to life with handcrafted canvas prints that reflect your identity and preserve your cherished moments forever. In a digital world, our homes and offices are the spaces where we can truly express ourselves. Experience a product made with love as we help you personalise your space.
Trust in Every Print. Canvas Print Co. – Where Quality Meets Care.
🌟 Contact us today and let’s transform your memories into timeless art!
🌍 Nationwide deliveries.
Online Canvas Orders | Custom Wallpaper Online Orders
For more information:
info@canvasprintco.co.za | (071) 281-6101
💬 Share your experience by leaving a FACEBOOK or GOOGLE REVIEW!
🌈 Show us what inspires you by mentioning our handle @CanvasPrintCo
💌 With all our love xx
Source: https://www.bhg.com/home-improvement/walls/wallpapering/how-to-apply-peel-and-stick-wallpaper/